How To Install Django on Windows 10 | Use Django with ATOM
This tutorial will not only help you answer the how to install Django on Windows 10 question but also help you install Django if you have Windows 7, Windows 8 or Windows 8.1.
You can follow the same steps for all the windows versions mentioned above.
Step 1:
- Download python.
- Go to https://www.python.org/downloads/windows/
- It will take you to a page where you’ll find the latest python releases for Windows.
- Here are the two latest python releases for Windows.
- Then select Python 3 Release, it will take you to the downloads page.
- Scroll to the bottom and find the “Files” section.
- Here you will see a list of download version with the download link and details.
- As we are going to install python on 64 bit OS we will select the Windows x86-64 web-based installer.
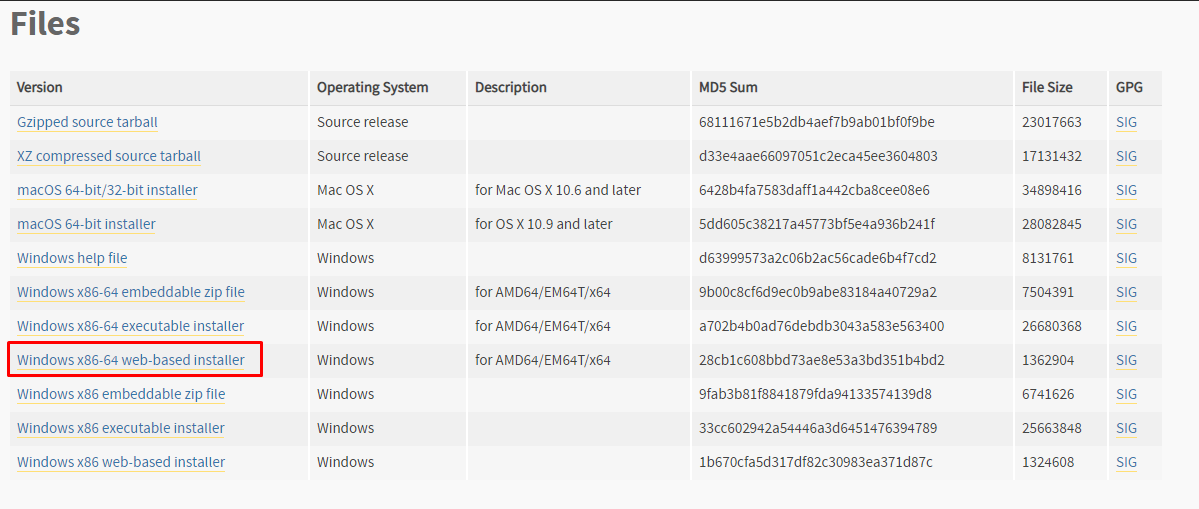
Download the Windows x86-64 web based installer
Step 2:
- Once the file is downloaded start the setup. Make sure to check the “Add Python 3.7 to PATH” depending on your OS.
- Then click on Install Now.
- The wizard will show the progress of the setup.
- After it’s installed click on “Close”.
Step 3:
- Go to Start on your windows and search for “Windows Powershell”.
- Right-click on it and select the “Run as administrator” option.
- After opening the Windows PowerShell, we need to install virtualenvwrapper.
- It is used for creating isolated environments.
- You can create an isolated environment for each new Django project.
install pip windows
pip install virtualenvwrapper-win
- Now, we’ll create a virtual environment for a project
mkvirtualenv mywebsite
- To activate the environment mywebsite we have to run the following command.
workon mywebsite
- Next, we are going to install Django with the pip command
pip install django
- You can check the Django version by executing the following command.
python -m django --version
- We’ll set the current directory to C drive.
cd \
- The next step is to create a new directory to store the new project that we are going to work on. In this case, it will be Webdesign.
mkdir newdir
- Once you create the directory, set it as the current directory.
cd newdir
- Now, we need to startproject with the
django-admin startproject projectnamewhere we will replace the projectname with the name of the project. As I have mentioned already it this case it will be Webdesign.
django-admin startproject webdesign
- Set the current directory to the project directory i.e Webdesign.
cd webdesign
- After that is done simply run the
python manage.py runserver
- You can refer the GIF or follow the commands.
- The GIF will show you how to install Django on windows step by step from here onwards.

- After doing this, go to your browser and type on your address bar http://127.0.0.1:8000/ and Voila! You’ll see the Welcome page.

Django Welcome Page
Step 4:
How to activate Django with ATOM?
- Go to ATOM website and install it
- After installing atom, go to the settings page and click Install packages. Search platformio-ide-terminal. Install it.
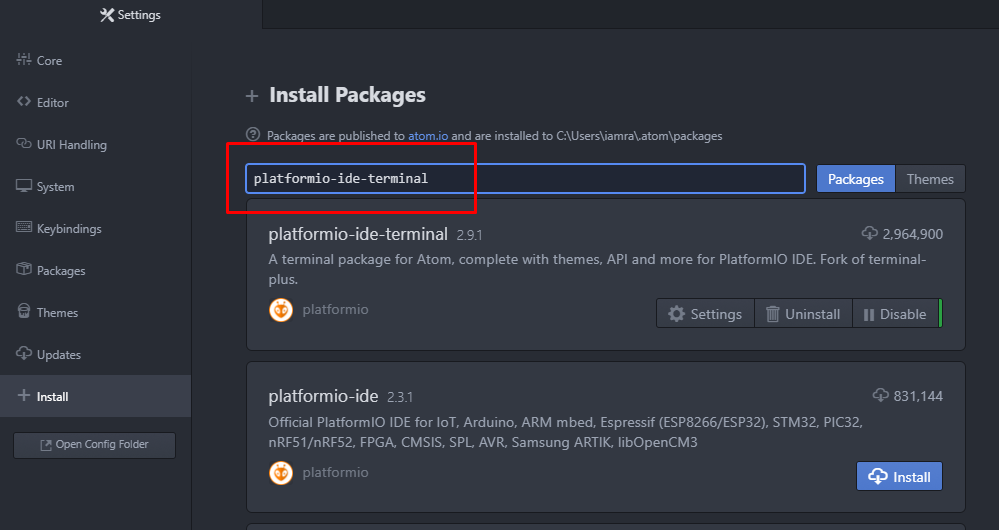
Install platformio-ide-terminal
- After that add your WebDesign folder into ATOM as a project folder. You can find it File > Add Project Folder
- Then you can find a plus button on ATOM down left corner. click it
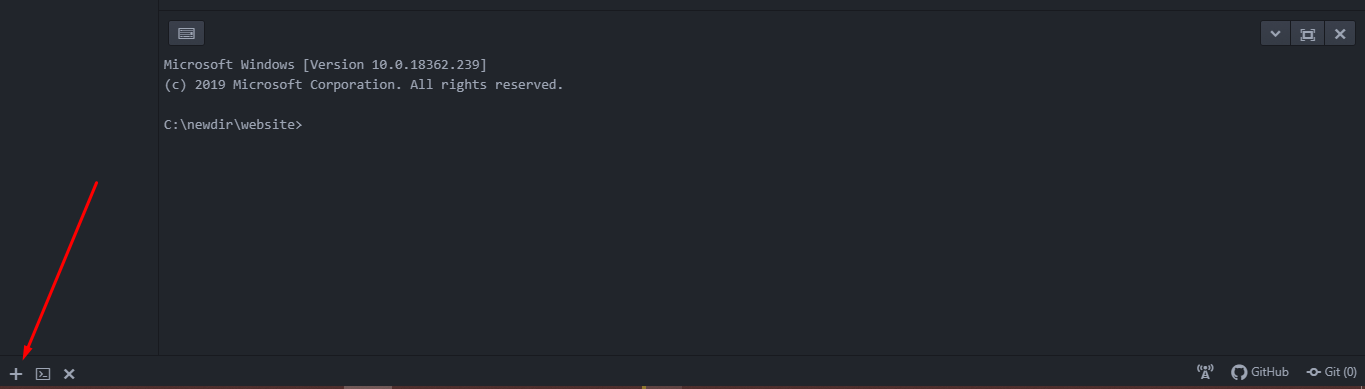
Click the Plus button
- In this command line, type
python manage.py runserver - Voila! Your Django is now live! Check on browser http://127.0.0.1:8000/

Create simple hello world application in Django | DCB 7:33 PM on July 19, 2019 Permalink |
[…] At first check out how to install Django! […]
LikeLike